 EN
EN

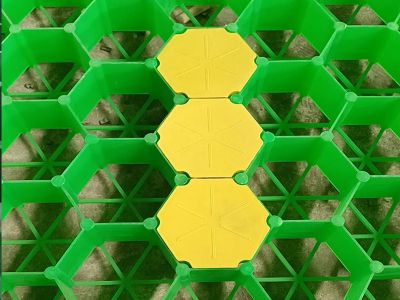
Installing geo grid on slopes is an important step in stabilizing soil and preventing erosion. When installed correctly, geo grid reinforces the ground, improves slope stability, and helps reduce the risk of landslides. At JRX, we understand that a strong foundation and proper installation are essential for long-lasting performance. With high-quality geo grid, you can create a durable slope reinforcement system that is both effective and environmentally friendly. This guide explains the best practices for installing geo grid on slopes and avoiding common mistakes. Geomembrane
What Is the Best Way to Install Geo grid on Slopes?
Proper preparation is the key to successful geo grid installation. Begin by clearing the installation area of rocks, vegetation, roots, and debris to create a clean working surface. Next, inspect the slope angle. If the slope is too steep for the design requirements, regrade it to the appropriate angle before installation. Geotextile
Once the surface is prepared, roll the geo grid out over the slope, making sure it lies flat without wrinkles or folds. Secure it temporarily using stakes or anchors to prevent movement during installation. After positioning the geo grid, backfill it with the specified soil or aggregate material. Compact the fill thoroughly in layers to ensure the geo grid interlocks properly with the surrounding material. For steeper slopes or projects requiring additional reinforcement, install multiple layers according to the engineering design, maintaining the recommended spacing and overlap. Finally, inspect the completed installation to ensure the geo grid is securely placed and evenly covered. JRX geo grids are designed to provide reliable reinforcement and long-term slope stability when installed correctly.
What Common Mistakes Should You Avoid During Geo grid Installation?
Several common mistakes can reduce the effectiveness of a geo grid system. One of the biggest errors is failing to prepare the site properly. Leaving rocks, roots, or loose debris beneath the geo grid can create weak points that compromise stability.
Another mistake is ignoring the slope angle. Installing geo grid on slopes that exceed the recommended design limits can reduce its performance. Avoid stretching the geo grid too tightly, as it should remain flat while retaining slight flexibility to accommodate ground movement. Skipping proper soil compaction is another frequent problem, as loose fill can shift over time and reduce reinforcement strength. Finally, placing heavy loads on the slope before installation is complete may damage the system or cause displacement. Following JRX installation recommendations helps prevent these issues and ensures reliable long-term performance.
How to Ensure Proper Drainage When Installing Geo grid
Effective drainage is essential for maintaining slope stability. Water trapped within the soil can weaken the slope and increase the risk of erosion or failure. Before installation, inspect the site for low areas where water may collect and reshape the surface to encourage proper runoff. Geocell
Installing drainage channels or shallow trenches along the slope can help direct water away from reinforced areas. A layer of crushed stone or gravel beneath the geo grid also improves drainage by allowing water to flow freely while supporting the reinforcement system. In many projects, a geotextile fabric is placed beneath the aggregate layer to separate soil from the drainage material while still allowing water to pass through. Combining proper drainage design with JRX geo grid creates a stronger, more durable slope reinforcement system.
How to Install Geo grid for Maximum Slope Stability
To achieve the highest level of slope reinforcement, begin by thoroughly preparing the site. Remove vegetation, loose soil, and debris, then grade the slope to the required angle. Roll the geo grid from the bottom of the slope upward, ensuring each section is aligned according to the project specifications.
Secure the geo grid with anchors or stakes to prevent movement during backfilling. Place fill material evenly over the geo grid in controlled layers and compact each layer before adding the next. Gradual filling prevents shifting and ensures proper interaction between the soil and geo grid. After the reinforcement is complete, establishing vegetation such as grass or ground cover can provide additional erosion control by helping bind the surface soil together. JRX geo grid systems are engineered to deliver dependable slope stabilization when these installation practices are followed.
What Tools and Materials Are Needed for Geo grid Installation?
Having the proper equipment makes installation more efficient and helps achieve better results. The primary material is the appropriate type of geo grid selected for the project's soil conditions and load requirements. Site preparation typically requires tools such as shovels, rakes, and grading equipment to shape and level the slope.
A plate compactor or hand tamper is essential for compacting fill material after placement. Stakes or anchors are used to secure the geo grid during installation, while a measuring tape and level help ensure proper alignment and placement. If vegetation will be added for erosion control, a hose or irrigation equipment may also be needed to support plant establishment. Wearing appropriate safety equipment, including gloves and protective eyewear, is recommended throughout the installation process.
By preparing the site carefully, using quality materials, and following proper installation techniques, JRX geo grid systems can provide long-lasting slope reinforcement, improved drainage, and reliable erosion control for a wide range of applications.